Without big notice, the updated version of the Apple iMac (Late 2013) was presented in september. Equipped with a Intel Haswell-Processor, new grafic-chipset and WLAN-support after standard 802.11.ac,the all-in-one is now on the current state of technology. In both models (21,5” and 27”) there are installed 8GB Ram as standard, which can be extended to a maximum of 32 GB at the 27”.
Also the new 2013 model it is recommended again to buy the iMac with the smallest memory capacity and upgrade the RAM yourself. Depending on memory upgrade, several hundred euros can be saved by this way. The upgrade of the pc memory, can be performed by a minimum of effort, even by beginners.
Special case – Apple iMac 21,5 inch
Unfortunately the iMac 21,5” can not readily be upgraded by yourself, because the display is bonded to the housing. To upgrade the RAM in 21,5 inc iMac, the expansion of the display panel + logicboard is inevitable, which will result in loss of validity of the guarantee.
Difficulty:
Frequently asked questions
How much memory can be installed up to?
In the basic configuration of the iMac in 2013 8GB of RAM are installed. The RAM can be upgraded but with little effort to a maximum of 32 GB at 27 inch iMac. IMac 21.5 inch, however, the memory can not be upgraded itself.
Remains the apple guarantee?
The memory of the iMac 27 inch can be upgraded by yourself, without impact on the apple product guarantee or AppleCare Protection Plan. The apple guarantee remains valid.
Which manufacturer produces the original memory modules?
Apple obtains the memory of brand manufacturers such as Hynix, Elpida and Samsung. Generally, it is of secondary importance by which manufacturer the memory was produced, as long as the technical data (timing, latency, etc.) are correct. Experience has shown, that the sale of brand products is recommended, because there are often problems with noname-memories.
Can different memory sizes be mixed?
In each slot, memory moduls with 4 or 8GB can be used. Thereby different sizes can generally also be mixed in pairs (for example 2x4GB + 2x8GB). Then however, the dual-channel left out. But the impact on the performance of the iMac is not noticeable in pracice. During an upgrade it is fundamentally important, that the memory specifications match exactly.
Possible memory combinations at the iMac 27 inch
Note: The memory-benches 1 + 3 and 2 + 4 belong together and are marked in color in the table. Same memory modules should be inserted into related memory banks.
| Bank 1 | Bank 2 | Bank 3 | Bank 4 | Total |
|---|---|---|---|---|
| 4 GB | 4 GB | 4 GB | 4 GB | 16 GB |
| 4 GB | 8 GB | 4 GB | 8 GB | 24 GB |
| 8 GB | 4 GB | 8 GB | 4GB | 24 GB |
| 8 GB | 8 GB | 8 GB | 8 GB | 32 GB |
Suitable memory moduls for the Apple iMac
[Last updates: November 11, 2013]
Especially with no-name memory modules I’ve made some very negative experiences. Therefore, the following selection contains only high quality memory modules that I could test more than once personally in my professional life and can recommend in good conscience.
All specifications are exactly the same with the original memory modules. That’s the only way to ensure a smooth upgrade and a stable operation.
iMac (Late 2013)
Upgrade to 16GB RAM:
- Kingston KVR16S11K2/16 Arbeitspeicher 16GB Kit (2x 8GB) (ca. 140 EUR)
- Corsair CMSO16GX3M2A1600C11 ValueSelect 16GB Kit (2x 8GB) (ca. 140 EUR)
- Crucial PC3-12800 16GB Kit (2x 8GB) (ca. 130 EUR)
- Samsung 16GB Dual Channel Kit 2x 8GB, DDR3-1600 SO-DIMM (ca. 160 EUR)
- Elpida 16GB Dual Channel Kit (2x 8GB), DDR3-1600 CL11 (ca. 130 EUR)
- Hynix 16GB Dual Channel Kit 2x 8GB DDR3-1600 SO-DIMM CL11 (ca. 150 EUR)
Upgrade to 32GB RAM:
- 2x Kingston KVR16S11K2/16 Arbeitspeicher 16GB Kit (2x 8GB) (2x 140 EUR = ca. 280 EUR)
- 2x Corsair CMSO16GX3M2A1600C11 16GB Kit (2x 8GB) (2x 140 EUR = ca. 280 EUR)
- 2x Crucial PC3-12800 16GB Kit (2x 8GB) (2x 130 EUR = ca. 260 EUR)
- 2x Samsung 16GB Dual Channel Kit 2x 8GB, DDR3-1600 SO-DIMM (2x 160 EUR = ca. 320 EUR)
- 2x Elpida 16GB Dual Channel Kit (2x 8GB), DDR3-1600 CL11 (2x 130 EUR = ca. 260 EUR)
- 2x Hynix 16GB Dual Channel Kit 2x 8GB DDR3-1600 SO-DIMM CL11 (2x 150 EUR = ca. 300 EUR)
Installation instruction
For the upgrade tool is not required. When matching memory modules are ready, you go directly to the exchange:
| Step 1: Directly above the power cord socket is the release button for the overlying memory cover (see photo marking). Because it is very narrow, it is easiest pushed in with a flat plastic object (such as an SD memory card or debit card). |
|
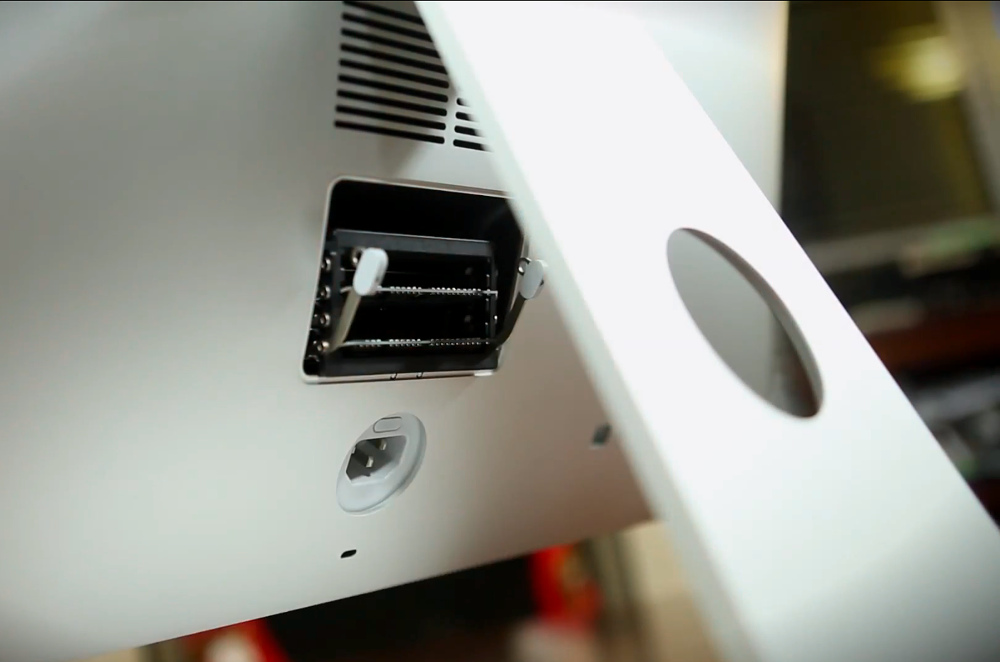
| Step 2: After the release button is pressed, the memory cover opens and can be removed. On the inside of the cover is a drawing which shows the swing out of the slot block. |
|
| Step 3: Now, the block hast to be unlogged first by the two levers (left and right). Therefore, press the lever outside gently and swing the slot block. |
|
| Step 4: Now, the RAM modules can be easily replaced. When inserting the new memory module, please pay attention to the notch between the contacts. The memory banks 1+3 and 2+4 belongs together. |
|
| Step 5: After the new memory modul has been installed, the slot block is pivoted back into the housing and the cover is clipped. |
Note: There is a rating embedded within this post, please visit this post to rate it.
