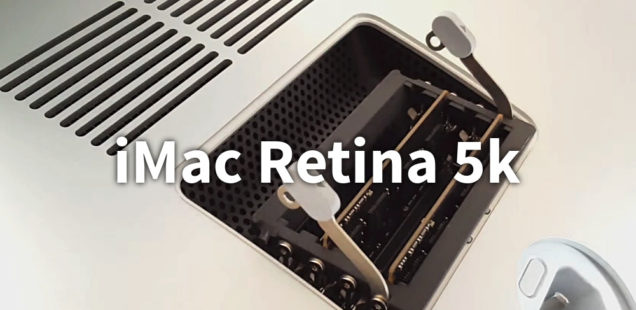
iMac Retina 5K: Memory upgrade (RAM)
Apple is charging excessive prices for memory. With the iMac, these prices are about three times higher than the market’s standard storage prices. Ultimately, however, Apple uses standard RAM memory bars that are freely available on the market. So what could be more obvious than simply upgrading the RAM in the iMac Retina yourself?
Fortunately, the memory of the Apple iMac Retina (5K) 27 inch can be upgraded with a few simple steps. That’s why I recommend buying the 27-inch iMac Retina with the smallest amount of memory, and then upgrading the memory myself. With the smaller brother with 21.5 inches, however, the main memory remains firmly soldered – retrofitting is therefore not possible. As a buyer, you have to consider exactly how much memory you will need in the coming years when buying the 21.5 inch model.
Difficulty level:
Frequently asked questions
Which iMac Retina models have memory upgrade capability?
| Apple model | Size | max. RAM | Upgradeable |
|---|---|---|---|
| iMac Retina 5K (2017) | 27 Zoll | 64 GB | |
| iMac Retina 5K (End 2015) | 27 Zoll | 64 GB | |
| iMac Retina 5K (Mid 2015) | 27 Zoll | 32 GB | |
| iMac Retina 5K (End 2014) | 27 Zoll | 32 GB |
Will Apple’s warranty be maintained?
The memory of the iMac Retina 27″ can be upgraded by yourself and the Apple manufacturer’s warranty is maintained. Apple even offers its own illustrated tutorial online.
Can different memory sizes be mixed?
Memory modules with 4GB, 8GB and 16GB can be used in each slot and from the end of 2015 also 16GB. As a result, different sizes can be mixed in pairs (e. g. 2x 4GB + 2x 8GB) in principle. Then, however, the dual channel is dropped. However, the impact on iMac performance is not noticeable during operation. When upgrading, it is important that the memory specifications are exactly the same.
Possible memory combinations with the iMac Retina 27″
Hinweis: The memory banks 1 + 3 and 2 + 4 belong together and are color-coded accordingly in the table. Same memory modules should be used in related memory banks. Examples of possible configurations:
| Bank 1 | Bank 2 | Bank 3 | Bank 4 | Gesamt |
|---|---|---|---|---|
| 4 GB | 4 GB | 4 GB | 4 GB | 16 GB |
| 4 GB | 8 GB | 4 GB | 8 GB | 24 GB |
| 8 GB | 4 GB | 8 GB | 4 GB | 24 GB |
| 8 GB | 8 GB | 8 GB | 8 GB | 32 GB |
Matching memory modules for the iMac Retina
[Last updated: 03/03/2018]
 Annotation
Especially with non-name memory modules I have had some very negative experiences. The following selection therefore contains only high-quality memory bars, which I was able to test personally several times in my professional life and which I can recommend with a clear conscience.
iMac 5k (2017)
iMac Retina 5k (2017)
4GB memory modules:
8GB memory modules:
- Crucial 16GB Kit (2x 8GB) DDR4 2400 MT/s (PC4-19200) SODIMM 260-Pin
- Samsung 32GB Kit (4x 8GB) DDR4 2400Mhz SODIMM
16GB memory modules:
iMac 5k (End 2015)
iMac Retina 5k (End 2015)
4GB memory modules:
8GB memory modules:
- Crucial 16GB Kit (2x 8GB) DDR3 1866 MT/s (PC3-14900) SODIMM 204-Pin
- Samsung 16GB Kit (2x 8GB) DDR3 1866MHz SODIMM
16GB memory modules:
iMac 5k (2014/2015)
iMac Retina 5k (End 2014 / Mid 2015)
4GB memory modules:
- Samsung 8GB Dual Channel Kit (2 x 4GB) 204 pin DDR3-1600 SO-DIMM
- Elpida 8GB Dual Channel Kit (2x 4GB) 204 pin DDR3-1600 CL11
- Kingston 4GB DDR3 SO-DIMM PC3-12800 1600Mhz
8GB memory modules:
Preparation
The iMac Retina must be shut down before installation. We also remove the power plug and other cables before starting the upgrade. Then place the iMac Retina carefully, with the display facing down, on a soft surface (e. g. towel) on the table. This means that the display is not scratched and we can easily reach the memory cover for installing the new memory modules. Special tools are not required for installation.
Installation instructions
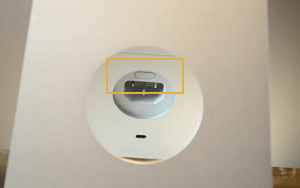 |
Step 1:Directly above the power cable socket is the release button for the upper memory cover (see photo marking). As this is very narrow, it can be pressed in with a flat plastic object (e. g. SD memory card or bank card). |
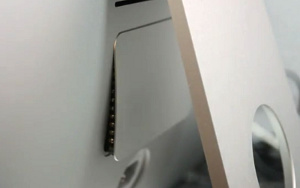 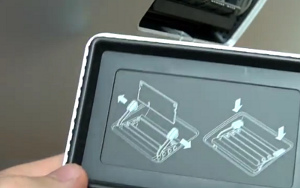 |
Step 2:After the release button has been pressed, the memory cover opens and can be removed. On the inside of the cover there is a drawing showing how to swing out the slot block. |
 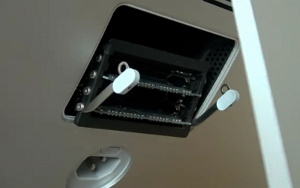 |
Step 3:Now unlock the slot block first with the two levers (left and right). To do this, press the levers slightly outwards and swing out the slot block. |
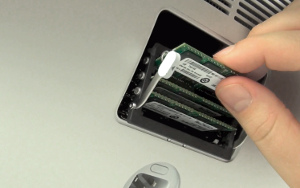 |
Step 4:Now the RAM modules can be easily exchanged. When inserting the new memory ledgers, pay attention to the indentation between the contacts.
The memory banks 1 + 3 and 2 + 4 belong together. For this reason, the same memory modules should be used in related memory banks. |
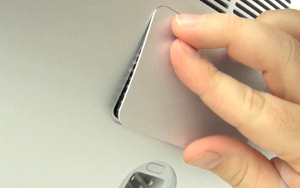 |
Step 5:After the new memory ledgers have been inserted, the slot block is swung back into the housing and the cover is clipped in. |


this page is most helpful, where do i buy extra memory from